Chapter Text
༺☆༻ Hello fellow authors and welcome to a new tutorial of my CSS GUIDES series! ༺☆༻
Ready to learn some brand new ways to spice up your works? Let’s get started then!
This first chapter is to create the glitching text effect similar to the Zalgo font. I know what you're thinking: if you can use the Zalgo font directly, why do you need this? Well, it's just an alternative, a sort of backup plan, just in case, one day, the Archive doesn't support the Zalgo font anymore, or the font itself is not available anymore in general. The glitch effect you will find here is the next best thing you can create through CSS and HTML and it can always be used.
Now, the first thing to do is creating the work skin, so you need to do the following steps:
Log-in and then click on the "Skins" link on the left side of the dashboard.
Once there, click on "My Work skins" and this will lead you to a page with the same title.
Now click on the "Create work skin" button on the upper right side of the page.
Give a title to your work skin, for example "Mirrors and glitch".
Make sure to give your work skin an original name, because if there is an already existing one with the same name, the site won't accept it. To avoid this problem, you could give the work skin the same name of the work you're going to use it for.
Remember that, after creating the work skin, you need to enable it in your story/work: open the first chapter of your story/work where you want to add the highlighted text, then click on the "Edit" button at the top of the page.
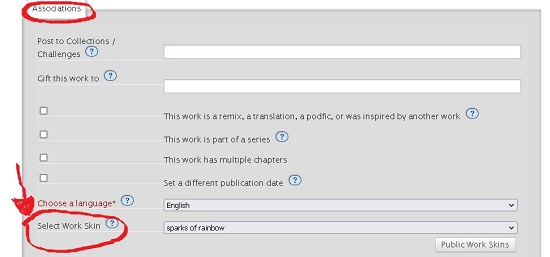
Now scroll down. In the section named "Associations" you'll see a section named "Select work skin". Click on it and you'll see a list of available work skins, including your custom one. Select the custom work skin you want to use and click "Post".
Just a little warning: Basic Formatting is actually the default work skin for Ao3, the one that only allows the standard black text and standard font. It's automatically added to the list of work skins available by the site, but it's not one of the custom work skins, it's just the way they give to the users to sort of change the work back to the default settings.
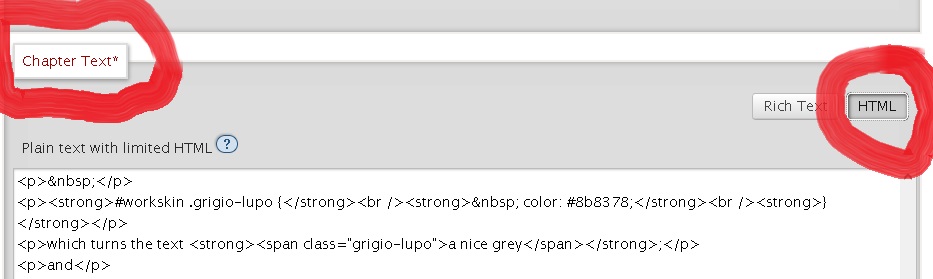
Now that the work skin is enabled, select "Edit" if the work has only one chapter, or “Edit chapter” for the chapter you want to apply the code to and in the section named "Chapter Text" (or "Work Text" is the work has only one chapter), select the HTML option instead of the “Rich text” option.
Allright, now you know how to create and enable your work skin, so let's get to the codes!
To have your text look like gibberish/scratched/glitching, you need to write both of these codes in your CSS:
#workskin .head {
position: relative;
}
#workskin .overlay {
position: absolute;
top: 0;
left: 0;
margin: 0;
}
These two codes allow you to get that special effect when applied together.
For the default effect, in HTML it looks like this:
<div class=“head”>This is the text with a glitch.<span class=“overlay”>Glitching effect looks like this </span></div>
And once posted, it looks like this:
This is the text with a glitch.
If you want to have the text look closer to the effect of the Zalgo font, you need to add the <sup> and/or <sub>command to your HTML, like this:
<div class=“head”> This is the text <span class=“overlay”><sup>I,iiilllll,,,,,iIIIiiiilllll</sup></span><span class=“overlay”><sub> i’jjjjiiiii’’’’’iiiijjjjjiii</sub></span></div>
And this is the result once posted:
This is the text.
You can also choose to use only the <sup> command (which is the command to have the text small and on top) or only the <sub> command (which is the command to have the text small and on the bottom).
With only the <sup> command it’s like this in HTML
<div class=“head”>This is the text.<span class=“overlay”><sup> I,iiilllll,,,,,iIIIiiiilllll </sup></span></div>
And looks like this once posted
This is the text.
While with only the <sub> command, it’s like this in HTML:
<div class=“head”>This is the text.<span class=“overlay”><sub> i’jjjjiiiii’’’’’iiiijjjjjiii </sub></span></div>
And it looks like this once posted:
This is the text.
If you want the glitch text to be in the same line as regular text (thanks to the user Carina_Nebula for asking!) you just need to replace the <div> command with another <span> command, so in HTML it looks like this:
This is the first part <span class="head"> the main text <span class="overlay"> more words </span></span> and the rest of the paragraph.
And once posted it looks like this:
This is the first part the main text and the rest of the paragraph.
But wait, that’s not all! You can make the glitching effect in color too! Just write this in the CSS (I’m making the base text in color #dc143c and the overlapping text in color #335cff for the example):
#workskin .testa {
position: relative;
color: #dc143c;
}
#workskin .sopra {
position: absolute;
color: #335cff;
top: 0;
left: 0;
margin: 0;
}
So in HTML it looks like this:
<div class=“testa”>This is the text.<span class=“sopra”><sup> I,iiilllll,,,,,iIIIiiiilllll</sup></span><span class=“sopra”><sub>I’iiilllll’’’’’iIIIiiiilllll </sub></span></div>
Or if you want it to be in the same line as the rest of a paragraph, it's:
<span class=“testa”>This is the text.<span class=“sopra”><sup> I,iiilllll,,,,,iIIIiiiilllll</sup></span><span class=“sopra”><sub>I’iiilllll’’’’’iIIIiiiilllll </sub></span></span>
And once posted it looks like this:
This is the text. I,iiilllll,,,,,iIIIiiiilllll.I’iiilllll’’’’’iIIIiiiilllll
And you can also use the codes with new fonts!
IMPORTANT! Please keep in mind, for all the codes you will use in the future, that in the line "font-family" of the new code, you need to write the exact same thing that is written in the "font-family" line in the original font code, NOT the name given to the font. To make an example, let's take the code I called Cally in the font tutorial: Cally is the name I gave to that font, but the font-family is actually Lucida Calligraphy, cursive, so you need to write Lucida Calligraphy, cursive in the code, not Cally. Basically, you just need to copy the entire "font-family" line highlighted in yellow in the original code and paste it into the code you want to create
If, for example, you want to use the Papyrus font in color #ff0000 (red) and size 24px for the base and the Lucida Calligraphy font in color #00ff00 (bright green) for the overlay, then you write this in the CSS:
#workskin .base {
position: relative;
color: #ff0000;
font-family: Papyrus, fantasy;
font-size: 24px;
}
#workskin .glitch {
position: absolute;
font-family: Lucida Calligraphy, cursive;
color: #00ff00;
top: 0;
left: 0;
margin: 0;
}
So in HTML it looks like this:
<div class=“base”>This is the text.<span class=“glitch”><sup> I,iiilllll,,,,,iIIIiiii</sup></span><span class=“glitch”><sub>I’iiilllll’’’’’iIIIiiii</sub></span></div>
Or, if you want it to be in the same line as the rest of the paragraph, it's:
<span class=“base”>This is the text.<span class=“glitch”><sup> I,iiilllll,,,,,iIIIiiii</sup></span><span class=“glitch”><sub>I’iiilllll’’’’’iIIIiiii</sub></span></span>
And once posted it looks like this:
This is the text.I,iiilllll,,,,,iIIIiiiiI’iiilllll’’’’’iIIIiiii
You can find lists of HTML color codes here, here, here and here.
Here you can find another list of HTML colors, which also includes fluorescent colors and metallic colors (just use the HTML code and don't mind the names, because they are the names of the crayons and don't work in the CSS).
A small suggestion: I found that using the HEX color codes instead of the rgb codes is safer, as it's less likely to cause trouble when you use them in a workskin. If you find a rgb color you like, or if the code given by the gradient generator contains rgb codes instead of HEX codes, you can use this rgb to HEX converter to get the matching HEX code for each rgb code.
Next chapter contains the codes for the vertical text, upside down text and for the mirror effect.